A modern window sill can be used not only as a stand for flower pots or a working area, but also aesthetically pleasing to the eye, being an element of decor both in a separate room and in the entire apartment or private house as a whole. Wooden window sills look especially exquisite, the manufacture of which is possible from different types of wood with a whole canvas or by gluing individual wooden planks. The model will fit the plastic profile of the window, covered with film, color and texture, reminiscent of natural wood, as well as the wooden frame of the window.
Order of manufacture and classification
Manufacturers of wood windowsills offer products from several species. A variety of colors and shapes allows you to choose from a wide range. Finished products are easy to install. This can be done even by ourselves.
Wooden window sills are made taking into account the necessary sizes, the purpose of the room and the wishes of customers regarding color and texture. The most popular and well-established tree species are oak and larch.. Oak window sills are very durable. With proper care and maintenance, they can last a very long time. Window sills from larch are no less durable, and compared with pine have a higher moisture resistance.
Depending on the room in which the installation will be carried out, it is worth deciding to make it from a whole piece of wood or its parts processed by milling, sheet piling and assembled or glued together. For example, for a kitchen where there is a high level of humidity, a window sill board should be made of a whole piece of wood, and special attention should be paid to the impregnation materials and varnish.
Wooden window sills can be classified according to various characteristics:
- in shape (classic lines and arches);
- in size (narrow - no more than 10 cm; wide, consisting of the width of the opening and the addition of 6 cm; large, serving as a working surface)
- by type of wood, and therefore, by color and texture;
- by the method of manufacture (from solid wood or from glued wooden boards);
- by the method of surface treatment.
The manufacturing of window sills is carried out only after removing all the necessary sizes. They are made by private companies, presenting a wide selection of products.
Installation steps
All information on how to install a wooden window sill can be combined in several stages. We list them:
- At the stage of preparation in the wall, it is necessary to make indentations of a rectangular shape on two sides, where then the side parts of the product will be inserted. Their height and depth will be 50 mm. If there are surface irregularities on which the windowsill will be installed, or chips in the wall, then they need to be leveled. After dusting, the installation site itself and the recesses in the wall must be treated with a primer.
- Before installation, the window sill must be treated with a moisture-proofing composition or its lower part treated with an antiseptic, protecting it from mold and insects, and then the product is varnished. Especially if you plan to install the window sill on the balcony.
- If the surface is ready for installation, the master puts the window sill in place for fitting. If necessary, if obvious surface distortions are visible, then wooden wedges can be placed under the windowsill at a distance of 50 cm from each other. The angle of slight inclination should be towards the room.
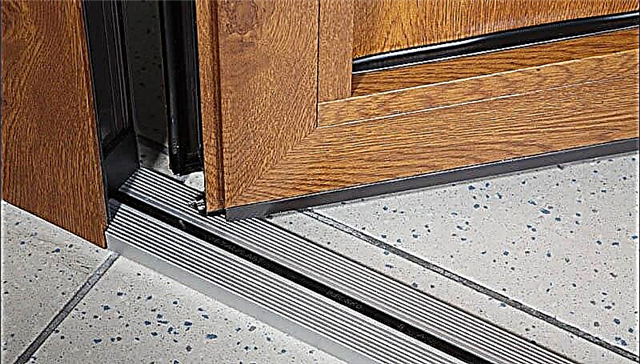
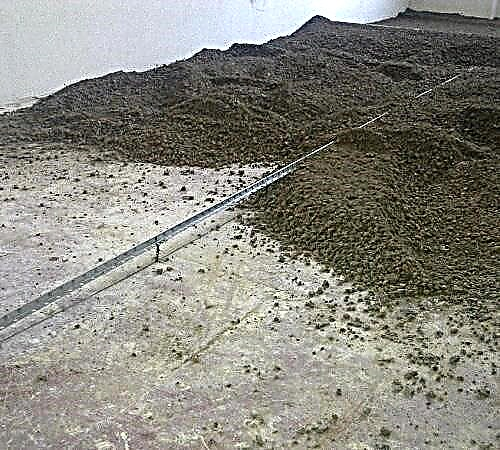
- In panel and brick houses, the installation of a wooden window sill can be carried out on a cement-sand mixture, which should cover the upper boundary of the leveling pegs by 5 mm. The fixed window sills press and remove excess solution. It is possible to install a wooden window sill with your own hands. In this case, you can focus on the use of mounting foam, rather than cement mortar. And for reliable fixing from the outside, screws are screwed through the window frame into the end part of the product, which allows it to be fixed securely. Silicone sealant will tighten the screwing points of the screws.
When installing wide wooden window sills, steel corners, metal pins or wide wooden bars are mounted under them. Thanks to this, the product will withstand heavy loads in the form of flower pots or using it as a working area. Check if the surface is level, you can use the level.
- Installation in a wooden house is carried out as follows: on the lower part of the board in contact with the wall, a felt treated with an antiseptic is attached, which will fill the voids; the prepared window sill is put into place and fasten it with the bar with nails without a hat, while the nail is hammered half into the beam, and the window sill is planted on the second part of the nail. It stands reliably.
Post-Installation Processing
Having installed a wooden window sill, not many know how to cover it. In order for the element to look natural and rich in the interior, most often it is varnished. For the option with white plastic windows or adherents of the classic style in the interior, the choice will be towards the use of white paint.
Before painting the window sill, you should carefully examine its surface. If there are bumps or roughness, then when applying a varnish coating or paint, they will be clearly visible. In order to prevent this from happening, the surface should be treated with a grinding sponge. So all errors will be removed and a layer of varnish or paint will lie better. Prepared wooden window sill, before covering with varnish or paint, must be inspected again. Coat the treated surface with the first layer of varnish or paint, and when it dries - the second. After drying, it is recommended to sand the surface with a machine with fine grain sandpaper, and then with a sanding sponge. When the third coat of paint is applied, the surfaces are allowed to dry completely. In the case of varnish, two layers of varnish are enough.
Repairs
Like any product, a wooden window sill requires compliance with the rules of its operation, otherwise urgent repairs will be needed. During operation, it is necessary to limit the ingress of moisture on its surface; use only special polishes and cleaning agents during cleaning. But sometimes there is a desire to update the window sill and radically change the design of the room or have to carry out its repair.
Repair can be caused by the following reasons: cracks, dents, chips or cracked paint on the surface. In the latter case, we update only the surface of the window sill, removing the old coat of paint and applying a new. It is also possible to repair the installed wooden window sill with your own hands in more serious cases. To do this, after removing paint or varnish from the surface, putty is applied to the place of cleavage, crack or recess. After drying, the surface is sandpaper. After removing the dust with a vacuum cleaner, you need to degrease the surface, and then apply a new coating layer. This will complete the repair. The algorithm of how to do the repair of wooden window sills with your own hands is quite simple. And how much such a repair will cost depends on the materials used.
Now it has become fashionable to choose window sills from natural materials. Wood is the best fit for this. The noble texture, the absence of chemical secretions when exposed to sunlight, strength and reliability - all this distinguishes this type of product from polymer analogues. If there is no fashion for curtains and curtains, the window should look perfect and the first thing that catches your eye is the window sill. That's why models of oak or larch are so appreciated, filling the room with the aroma of natural wood or pine needles.