Plastering of brick walls is carried out with special mixtures, the composition of which depends on the operating conditions of the surface. For internal walls in the apartment, any type of mortar based on cement, lime, clay and gypsum is allowed. External plastering of brick walls, for example, facade cladding, is carried out with mixtures exclusively based on cement and lime, since clay and gypsum are destroyed by atmospheric precipitation.
Necessary materials and tools
Before you plaster a brick wall with your own hands, you should take care of the acquisition of tools and materials that will be required in the course of work.
To prepare the surface and directly for plastering, the following tools will be required:
- falcon;
- trowel;
- at least one meter long;
- one and a half;
- grater;
- mixer;
- capacity for the preparation of plaster mortar;
- a hammer;
- chisel;
- brush with a metal pile;
- roller;
- brush width 150 mm;
- capacity with a ditch;
- scissors for metal;
- plumb line;
- laser level;
- roulette.
From the materials you need to prepare:
- metal or plastic reinforcing mesh, if you plan to carry out work outside the building;
- primer solution;
- profile rails used as guiding beacons;
- plaster mix in bags.
Surface preparation
The degree of adhesion of materials, and hence the strength and durability of the entire structure, depends on the quality of preparation of the brickwork before applying the stucco mixture. The following describes the step-by-step process of preparing walls.
Cleaning
It is necessary to remove from the surface to be plastered: dust, dirt, smudges of cement and fasteners. This procedure is required to be carried out not only on old walls, but also in new buildings. At this point, you should also “embroider” the seams by removing excess mortar, for which a metal scraper or chisel is used.
Identification of deficiencies and their elimination
Before the start of the main work, it is necessary to conduct an external inspection of the wall surface and identify all cracks and crevices. The disadvantages are eliminated with a cement-sand mixture.
If you skip this stage of work, especially in the case of walls that enclose the interior from the street, moisture can accumulate in crevices and cracks. When frosts occur, the water freezes and the masonry breaks.
At this stage, it is also recommended to treat the surface with antiseptic agents to avoid mold and mildew.
Primer
This is a mandatory procedure for preparing a wall for plastering, which is often passed by beginners, considering priming the walls unnecessary. Application of a deep penetration primer significantly reduces surface porosity and enhances the adhesion of masonry and mortar.
Reinforcement
Strengthening the plaster layer with a reinforcing mesh is performed during external work, this procedure is not necessary for internal partitions.
A metal or plastic mesh is fixed with special anchors in the joints of the masonry, but most often this process is carried out after applying the first layer of plaster, into which the mesh is pressed.
Solution preparation
Before starting work, you should decide what is better to plaster the brick walls inside the house in a particular room. The use of mixtures based on gypsum and clay in rooms with high humidity is not recommended. Mixtures based on cement and lime can be used in any room.
Currently, for the plastering of walls, mostly ready-made dry mixes are used, which need only be diluted with water according to the instructions.
Before plastering the brick walls inside the house with mixtures with a predominance of gypsum, you should know that such mixtures very quickly gain strength and dry, so the amount for a single batch should be limited.
The technology for preparing the solution is the same for all types of mixtures:
- Dry ingredients are poured into a container designed to prepare a solution.
- The required volume of water is prepared, according to the instructions, and poured into the container.
- Using a mixer, the mixture is brought to a homogeneous mass.
- The prepared solution is left to “rest” for 10 minutes.
- The mixture is again stirred with a mixer. The solution is ready to work.
Marking and installation of beacons
For beginner finishers, high-quality plastering of the wall without the use of beacons will be very difficult. In order for a beginner to figure out how to plaster a brick wall correctly, he will have to start by setting up guides that will allow applying and leveling the mortar at the same level.
To accurately set beacons use the laser level. It is installed on the floor so that the beam fights off the required distance from the wall, which is planned to be aligned with plaster.
As guides, a metal profile is used, which is attached to the brick base on the mortar. To do this, a small amount of the solution is diluted in which gypsum is added so that the setting takes place faster. To fix the beacon, you need to throw a few piles of the solution vertically and drown the profile in them, focusing on the beam of the laser level.
The number of profiles is selected based on the length of the wall and the distance between the beacons of 1000 mm. This gap allows you to effectively and efficiently apply and level the solution. For the installation of the first beacon, 100 mm deviate from the corner. After applying the plaster, the metal profiles are removed, and the installation site is leveled with a solution.
Plastering
Now that we have decided what to plaster the walls of brick inside the room, installed beacons and prepared the mortar, the process of plastering begins. Below we describe in detail the classic method of applying the solution to the wall and leveling it with various tools.
When preparing the solution, the volume of the mixture should be calculated for one working hour, otherwise the solution will lose its astringent qualities.
At the first stage, the preparation layer is applied - spray. For the first layer, it is desirable to increase the proportion of binder in the mixture, the consistency of the solution is thick sour cream.
The thickness of the initial layer should not exceed 5 mm, the laying of the mortar begins from the lower left corner, then, gradually filling the gaps between the beacons, they move to the right to the end of the wall. It is best to apply the mixture with a plaster spatula from a falcon, rubbing the mortar a little into the brick base, it is not necessary to level the spray. In this way, better adhesion is ensured as compared to spraying the solution with a trowel.
The second stage is started after the spray has dried. Primer coat it is applied up to 20 mm thick; standard ratios of dry material and water are used to prepare the solution.
The solution is applied by spraying, after which it must be leveled, smoothing the surface with a rule based on beacons. Work is also performed from the lower left edge. It must be borne in mind that the plastic mixture under its weight will settle a little, therefore, after completely passing the space between the lighthouses, you should again go through the rule from the lowest point, leveling the surface.
Before application cover layer it is necessary to allow the soil to dry well, but first you need to remove the beacons and seal the voids with a solution.
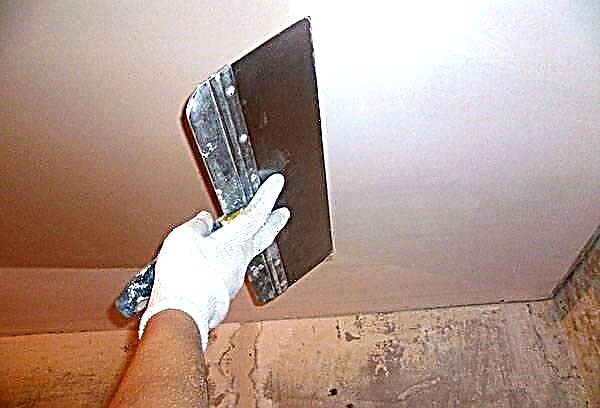
The coating is applied with a thin (up to 2 mm) layer. In the mixture being prepared, it is desirable to maximize the proportion of cement, and use fine, sifted sand as a filler. The mixture can be applied with a wide spatula with the required leveling with a trowel, after which the surface is rubbed with a trowel.
Final stage
For the final preparation of the wall for subsequent finishing work, grouting is required. This process is carried out on the still not completely dried surface of the plaster, if the mortar has firmly risen and dried, moistening the base and a small amount of cement-sand mixture will be required.
The task of the finisher is the elimination of small irregularities, sagging, remaining after working with a trowel. Work is carried out only with a clean tool, for which it is recommended to install a container of water next to the master, where it will be convenient for him to wash the grater.
The plaster is rubbed in a circular motion without applying great effort so as not to damage the plastered surface.
The nuances of plastering brick walls outside
Work with external walls has its own characteristics:
- as the main material, only cement-sand or cement-lime mixture is used;
- compulsory reinforcement is carried out;
- at the corners of the structure and in places where the walls adjoin the window and door openings, it is required to install plastic linings and corners;
- recommended plaster thickness up to 20 mm;
- priming is carried out before applying the plaster to the base and before applying the finish layer.